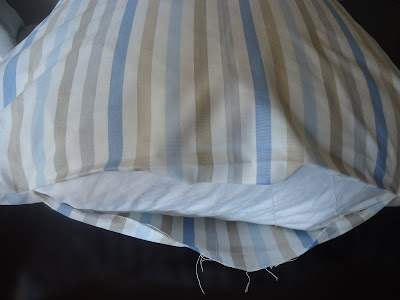
Normally, I would have posted a "no sew" throw pillow DIY...but this time while my mum was visiting we busted out the sewing machine!! Daunting for some, I know. Believe me, the last time I had used a sewing machine was in Grade 8 when we made boxer shorts!? So random.
But, I really wanted my Nana's sewing machine and so my mum (who used to be a sewing Queen) showed me the basic ropes and we started to sew. We'll see how long this 30 year old machine works but for now...no problemo. I love the thought of my Nana sitting at this machine for hours and sewing with love.
You can do this by hand (it will take awhile so I would suggest you set up a good movie first) or whip out that machine. Making your own pillows allows you the freedom to choose any fabric you want and all you have to pay for is the fabric!
Here is how to do it...
1. Choose your fabric
You know how much I love Tonic Living, they have tons of great options and retro designs. But, this time I happened to use the same fabric that I used in covering my Nana's chair. Here is that tutorial: What's Old is New. The fabric was a steal at 8.99/m from Ikea.
I had enough leftover from the chair DIY so why not make a pillow for the couch?
2. Measure
There likely is a real science to this but instead we just laid the original pillow cover onto the new fabric and folded the fabric over (that way you already have seam that doesn't require sewing. We gave ourselves one extra inch of sewing space. So for example, if your pillow insert is 16X16, you would measure 17X17. Cut off any extra material.
Don't forget to iron your material after you measure and cut.
3. Pin it
Pin the edges of the material with the right sides facing towards eachother.
4. Get your sewing on
Using your line measure on your sewing machine, we sewed with a 3/4" seam allowance. We wanted the pillow to be good and snug in there. Clip the corners a bit so you dont have tons of extra fabric. Turn your fabric right side out and we used the blunt end of a kebab skewer (technical tools!) to push out the corners. This is my mum sewing in her jammies ;)
5. Stuff it
If you have the ability to add a zipper to your fourth side, do it! We opted for the easy peasy way and stuffed our pillow into the fabric, pinned it to make sure it closed and sewed up the final side. Now, the downside to this is that you can't remove the pillow cover to wash it. The only way you can remove the stains is by spot cleaning. But, for 8.99/metre, it was worth it!
VOILA...a fresh.fabulous.sophisticated throw pillow that was pennies to make and looks fab on the living room couch.
Have you made throw pillows before? If so, I would love for you to send me your photos of them. If not, try it!
Here is some inspiration and don't be shy to mix patterns and textures...
Oh and don't forget you can add little details here and there to your pillows. I was at a fabric sale a couple of weekends ago and picked up two little chevron buttons for $1 each. One night while watching TV I sewed them onto one of the pillows in the TV room. Easy and adds a little charm.
Also, you dont need to always go out looking for fabric. You may have a great table cloth, blanket or set of curtains tucked away in your linen closet that would make great throw pillows. Think outside the box!
Keep it Beautiful.


No comments:
Post a Comment