Monday, December 10, 2012

Natural Christmas Decor

Happy Monday everyone! This weekend was spent getting our house Christmas ready. We decked the halls, got our tree and made it look pretty.

Lights on, now let's decorate it! (If you look closely, you'll see our elf-on-the-shelf in the middle of the tree. That's where she hung out for the next day!) Finished tree pic to come.

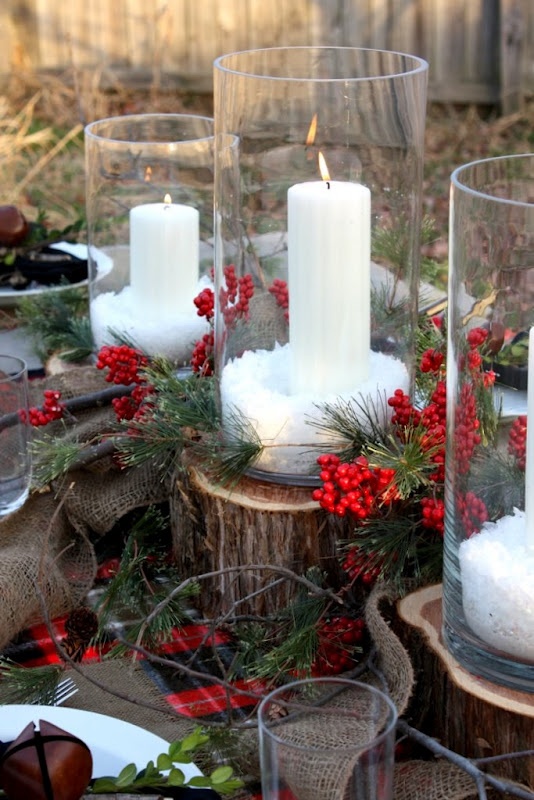
There is something so beautiful about greenery, pinecones and the smell of fresh trees at Christmas time. You can easily bring natural elements into your holiday decor to add to what you have, or create a cozy natural look. If you're looking to keep your holiday decorating simple, just by adding a handful of pinecones to a dish or hurricane lantern will create holiday beauty. You can also step outside your door and collect a few branches and pinecones to create instant fabuloso in and outside of your home.

I decided to create a natural look on our front porch using our urn. You can pay someone to do an urn for you or you can do it for very little money, or free. I did buy the magnolia leaves (which I found for a STEAL at Home Depot), and I had the pinecones and red sticks from last year, but the rest of the greenery and sticks, the kids and I collected on a walk this weekend.


Start from the outside and work your way in. Try to add all different types of greenery and textures. This will create dimension to your display. I got mine in there before the soil (that was already there from my "fall" display) froze. But, if you've missed that boat, one thing I have done before is:

*place a small bucket into the urn, fill it with clumping kitty litter, add your greenery/display and then pour water into the bucket. The litter will harden and freeze for the winter holding in your display. Voila! A fresh.fabulous.sophisticated way to use natural elements in your holiday decor. When Christmas is over, I'll just take out the red sticks and it will last me throughout the winter.

We woke up this morning to snow. I love how it touches the branches...

Here are some other ideas:

These pinecones attached to ribbon and hung from the window are very pretty

Pull out a mason jar, fill with cranberries, greenery, water and a floating candle. What a pretty way to light up your guest bathroom or sit on your kitchen window.

How easy, festive and pretty is this?

Lovely...

Simple, cozy, natural and elegant...
Having a party? This would look beautiful up your front steps...

I could definitely handle a hot cup of yummyness by this fire.

Here's an important tip! If you are bringing fresh cut boughs, wreaths and garlands into your home, make sure you spray them daily to keep fresh. Otherwise they'll start to droop and drop all their leaves.

Another tip! If you have unwanted branches from the bottom of your Christmas tree that need to come off, use them in other parts of your house. Instant "au natural".

Stay tuned for this week for more holiday decor and ideas.

Keep it Beautiful.


This post has been linked up with:
mop it up mondays

Friday, December 7, 2012

Fab Friday DIY: Advent LOVE

Happy Fabulous Friday!

I know, I know...I'm a little late on the Advent calendar. Our kids have the traditional calendar where they open a door each morning (nothing like a piece of chocolate before breakfast!) but I wanted to do something else. I was inspired by House and Home's 25 days of Christmas . Essentially, you take any kind of bag you want, fill them with Christmas goodies and number each one. For the month of December, your child/children open a bag each day as they countdown to Christmas.

So, enter in a DIY!

Here's what you need:

('scuze the weird lighting on the photos, the sun had gone to bed)

- 24 bags. They can be paper bags, mini gift bags, or I ordered cloth bags from Creative Bags. They're cute and the perfect size. Creative Bags is a fab website with tons of wrapping products and wrapping ideas. You should check them out! I would have started this DIY earlier, but I typed in my credit card number wrong and hence the delay for getting my bags. However, once all was fixed...the bags were here pronto!

- Numbers for the bags. I found these little numbers attached to clothespins at the dollarstore. But you could also paint them on yourself, use a stamp or stencil.

- Something to either put your bags in or display them. My plan this weekend is to string them up on a red beaded garland that I have in our Christmas box, but I need Mr. Fix-it to help me figure out how to string it up on our brick wall in the breakfast room. Hmmmm. For now, they're cozy in a basket.

- Goodies for the bags. The kids have their own little tree that they decorate with their ornaments so I bought some cute ornaments, craft ornaments that they can make throughout the month, candy etc.

Here's how you do it:
There really isn't a specific way to do it. I put a goody in each bag for each child, attached the numbers and placed them in the basket. VOILA! A fresh.fabulous.sophisticated Advent calendar that you can use every year and will surely get your little ones excited each morning.


Here are a few ideas that I've seen floating around:

mostlovelythings

martha stewart

Children's Party Network


Have a great weekend! Stay tuned for more holiday love next week.

Keep it Beautiful.


This post has been linked with:
Weekend Bloggy Reading
The Shabby Nest

Wednesday, December 5, 2012

The Smells of Christmas

What smells remind you of Christmas? For me, it's the smell of the Christmas tree, fresh pinecones and gingerbread.

Here is a great little recipe to have simmering on your stove that will instantly surround your home in Christmas love.


1 orange sliced
1 lemon sliced
4 cinnamon sticks broken into halves
3 tablespoons whole cloves
2 tablespoons whole all spice
1 tablespoon ground cinnamon
1 tablespoon nutmeg
4 cups water

In a saucepan, mix all the ingredients. Once it boils, turn it down to simmer and let the deliciousness take over. Just keep adding water as it boils down.

JOY TO THE WORLD!

Keep it Beautiful.

Monday, December 3, 2012

A sick break

Hi everyone,

I hope that you had a great weekend. I'm sorry I was MIA last week and have nothing for you today. Our big guy had the stomach flu :(

Of course he bounced back pretty quickly and it hit me with a vengeance. Just when I thought it was over, it decided to grace me with it's presence again yesterday afternoon. So I'm going to take the next couple of days to rest, get better and I'll be back at it.

On a fun note, a thank you goes out to The Dedicated House blog for featuring our goat cheese + sundried tomatoes + spinach = Wednesday Yummy recipe today!

On Saturday we did get the house decorated for Christmas and I'll have lots of ideas to come for holiday decorating and holiday party prep!

Talk soon!

Keep it Beautiful.

Wednesday, November 28, 2012

Wednesday Yummies: Healthy Mac 'n Cheese

In an effort to get more organized for the chaotic hour between daycare pick-up and after dinner,I decided to plant myself in front of the stove last Sunday afternoon and cooked up a storm. My big guy helped mix and measure and one of the recipes we made was from Jessica Seinfeld's (Jerry Seinfeld's wife) cookbook "Deceptively Delicious". Her cookbook is filled with yummy recipes with hidden veggies! Not only are they yummy, but they're healthy.

This was a big hit in our house last night with the kids and Mr. Fix-it. I doubled the recipe and froze half.

Homemade Macaroni & Cheese (with hidden cauliflower)


Ingredients:
1 1/2 cups elbow macaroni or spirals
1 tablespoon olive oil
1 tablespoon all-purpose flour
1/2 cup milk
1/2 cup butternut or cauliflower puree
1 1/2 cups shredded Cheddar cheese
1/4 cup reduced-fat or nonfat cream cheese
1/2 teaspoon salt
1/8 teaspoon paprika
1/8 teaspoon pepper

Directions:

1. Bring a large pot of salted water to a boil, add the macaroni and cook according to package directions until al dente. Drain in a colander.

2. While the macaroni is cooking, in a large saucepan, over medium heat...add the oil, then the flour, and cook, stirring constantly, until the mixture resembles a thick paste but has not browned, 1 to 2 minutes.

3. Add the milk and cook, stirring every now and then, until the mixture begins to thicken, 3 to 4 minutes. Add the vegetable puree, Cheddar, cream cheese and seasonings and stir until the cheese is melted and the sauce is smooth. Stir in the macaroni and serve warm.

You could add breadcrumbs to the top and bake in the oven but I knew my babes wouldn't go for that part. For the cauliflower puree, I just cooked a bunch of cauliflower in the microwave, added it to my food processor (with a bit of water) to get it that "baby food puree" consistency.

Voila! An easy, hearty, healthy and good weeknight meal for your family. From our table to yours.

Keep it Beautiful.

Related Posts Plugin for WordPress, Blogger...