Tuesday, March 26, 2013

Easter Decor!

Are you ready for Easter? Are you entertaining this upcoming weekend or laying low? We're STILL waiting for our baby girl. Her due date is tomorrow, so come on baby!!

If you are looking to do some Easter decorating, here are some easy ideas...

Yesterday I hit up the dollar store to add a little Easter love to our home. I found these cute little painted eggs (4 in a pack) and hung them on the branches that I currently have on the dining room sideboard.


On Cityline the other day, I saw one of the guests using plastic green grass from the dollarstore on her table. I've seen it there before and always wondered what I could use it for. Voila...a couple squares of green grass, a little easter grass, pussy willows and dollar store eggs = fresh.fabulous.sophisticated Easter centrepiece.

 
Do you have an Easter or Spring wreath?  I was looking around for something to add to our door and really wasn't feeling like spending $40-$50 on an Easter wreath. So, I just wrapped around three strands of these little blue and yellow egg garlands (dollar store) and added a few foam eggs (dollar store) to a grapevine wreath that I already had. Voila...Easter wreath.


Another idea is filling a glass vase/container with plastic eggs. Instant Easter!
Sorry about the light in the photo, that Spring sunshine wanted in!

Those are a few ideas to think about and feel free to use, when decorating your home for Easter. You can create fresh.fabulous.sophisticated festive spaces without feeling too hokey or breaking the bank.

My lates blog on the Ottawa Mommy Club is live today. Operation: Playroom Organization! Click on the link and click "featured articles".  Check it out!

Keep it Beautiful.

Friday, March 22, 2013

Fabulous Friday: Kitchen Reno Update

Happy Fabulous Friday everyone!

We're still waiting for babe. She's not due until Wednesday so technically she isn't late yet. However, I'm ready to have her earth-side!

We're still working away on our kitchen/breakfast room. With getting ready for babe, Mr. Fix-it's sore elbow (we've Google diagnosed him as having "golfer's elbow"...even though he hasn't been golfing, all these renos have hurt his poor elbow :( we haven't been able to finish it yet. Here is what has happened so far:

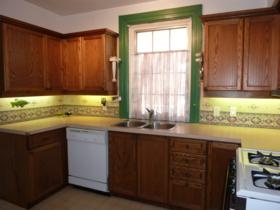
Let me remind you of what we originally started with....


The original kitchen

The original breakfast room
So when we moved in we painted everything out, added new hardwood flooring, backsplash, painted the walls, added new appliances and hardware. So much better!


However, it still wasn't finished. Painting the countertops was a great short-term DIY fix. I recommend doing it if you have ugly countertops that need some love.  Our breakfast room also needed to become more functional.  Check out my post Breaky Room/Kitchen Reno for all the background. 

So, here was our plan:


And here is the update:

We purchased the base cabinets from RONA..white, traditional shaker style and extra deep for storage.  Mr. Fix-it moved the electrical up the wall so that the cabinets wouldn't cover the outlets, he replaced the existing gross and old baseboard heating (yup, there is baseboard heating in the breakfast room because it is an addition) with new white ones, replaced the baseboards and repainted the walls to give them a touch up.  The walls are Farrow and Ball Pale Powder (its a soft greeny/blue/grey. Definitely beachy and who doesn't love the beach?).  He also painted the wall where the built-ins are going to go in the breakfast room. Instead of Farrow and Ball Manor House Grey that I was thinking, we went with Benjamin Moore Sea Haze (why not continue that coastal feel). Here's a little tip: when planning to build shelves, adding a different colour to the back wall of the shelves or pretty wallpaper gives the feature wall a pop and dimension to the room.
Benjamin Moore Sea Haze

New baseboards...clean and fresh.
 
 
And then arrived, the countertops. Yup, I'm in countertop heaven. We went with the Quartz and they're beauty. It's amazing what new clean countertops can do for a room. We went with "Arctic Ice"...essentially they're white with grey and white specs.


But, all good renos have their challenges.  The original laminate countertop wasn't the same height as the quartz AND with the house being a zillion years old, none of the walls are perfectly straight so the installers couldn't evenly shim up the countertop to meet the backsplash. Enter in...problem! See this little gap?

Ugh. So we called our good friend Raz who is our "go-to" guy for tiling. (Aside: If you need a tiler and live in Ottawa, I can hook you up...he's awesome!) The options are to either:
  •  re-do the backsplash
  • take off the lowest tile and find tile that will be the right measurement to border along the new countertop.
We love the look of the subway tile, it's clean and classic so replacing it wasn't really what we wanted to do. So option number two it is.  I went on the hunt to find tile and this greeny/blue glass tile wanted to come home...

However, it turns out it's not going to work with the measurement. Grrrrr. So that's where we are on the tile front. The countertop looks fab, but we still have a gap and we're on the hunt for tile.

As for a sink, we put in a deep single sink and I'm loving it.

yikes, don't look at my outside dirty windows!


So whatelse...oh, the lowest point in this reno...building the box around the fridge. What has always bothered me, is when you enter into our home one of the first things you would see was the side of our fridge. Not so nice. So, we thought, what an easy project to measure and build a box around the fridge. Enter in the low point :( With slanted walls, slanted floors, this quick project became a very long weekend project for Mr. Fix-it. Poor guy. I have a feeling the "golfer's elbow" got worse here. However, one thing that did go well, was the removal of the cupboard that hungout beside the fridge.  It held our tv and Tassimo machine (both of these will have new homes) and was just taking up space. I'm hoping to add a couple of cute bar height stools in this space so people can sit down, chat and have a drink of vino while we're in the kitchen.
The fridge box frustration, one side up!


so long cabinet


Fridge box and beadboard done


Now, we just need to add a little decor to the fridge box and set up some stools. Homesense has some pretty ones right now, all different colours :) 
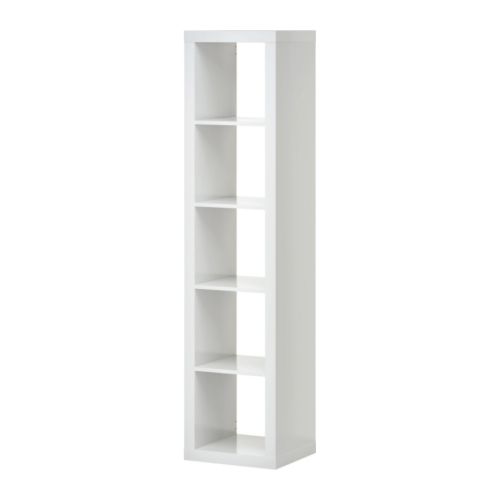
Next step are the built-ins.  Mr. Fix-it has measured and brought home the materials...now we just need to find the time to do it!
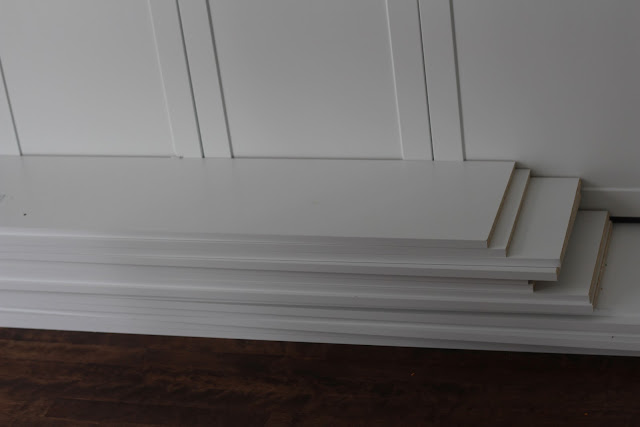
The stuff...
So there you have it folks. That's the update on our kitchen/breaky room makeover. I'm looking forward to having the shelves done. The storage underneath the new base cabinets is awesome. Stay tuned. I've also been collecting a few pretty things here and there for both of the rooms' finishing touches. Here's a sneak peak at a rug I picked up....pretty?

Have a fresh.fabulous.sophisticated weekend! If we're not having a baby this weekend I hope to have a few update pics to show you next week and a tutorial on shelf building 101.

Keep it Beautiful.

Wednesday, March 20, 2013

Happy Spring! A Little Mantel Love

Happy 1st day of Spring everyone!! Hmmm, this is the weirdest Spring weather I've ever seen..our backyard is still filled with a whole lotta white stuff!


Last week I was busy with having the kiddies home with me for March Break. I was sure this baby was going to arrive then but thanks to the help of my Mum, we managed to get the rest of the closets organized (including the babe's), have fun with the kids and Mum did ALL our laundry. God Bless her!! She's the best.

Every day I think this babe is going to arrive, but to no avail. Both our sons were born on the 20th day of the month so it would be pretty cool if she decided to make her grand appearance today. Hear that baby?

Whether Spring only feels like a date on the calendar today, I'm definitely ready for a change in season.  Easter is quickly approaching and my winter mantel needed a little love.  I headed down to the basement to see what I could round up.

I have this pink, feather Easter wreath from my Nana. It was the last wreath that hung on her door before she passed away. It's girly, whimisical and my Nana loved it and so do I. I don't think I would have ever bought it myself but there is something really adorable about it. So, it found a place on my Spring mantel and it makes me smile.


However, then Mum and I headed out to Homesense to look for some baskets for the playroom and I came across a beautiful mirror that said "please take me home". I've been stalking Homesense once a week since January waiting to scoop up the perfect mirror to finish off the mantel DIY we did in the Fall and this beauty was there.

Mr. Fix-it hung it and Nana's Easter wreath went back up too. I'm in mirror heaven. I'm glad I waited for the perfect one, instead of buying something just to fill the space.


Greenery, flowers and fresh colours can give your mantel an instant pick up and it's a nice change from the heavyness that we often do for winter.

Look around your home, I'm sure you have something that says Spring. When in doubt, pick up a few bunches of tulips at the grocery store (I suggest keeping them all the same colour for continuity) and line them up in three vases across your mantel. It's a fresh.fabulous.sophisticated way to get a Spring mantel.

Keep it Beautiful.

Alicia

This post has been linked up with:
Serenity Now @ www.serenitynowblog.com


Thursday, March 7, 2013

Long Time No Blog! Purge the Junk!

Sorry my post went live before I was done...here is the finished one!

Hello! Hello! Long time no blog!! I'm sorry I was MIA for most of February. Between having kids down and out with the flu and colds, wrapping up work at the office, renovating our kitchen/breakfast room and trying to get organized for this baby...I haven't had a chance to blog!

I'm happy to say that the sickies are gone (I hope I didn't just jinx it!), I've started my maternity leave and the renos are coming along. Phew!

Babe is due in 3 weeks so Mr. Fix-it and I have a list of daily things that we want to get done in the next two weeks. Its satisfying checking things off. I think he's nesting more than I am ;)

Last weekend he was on "purge the junk" mode. First priority was cleaning out our big guy's room. Holy cow! How can a 4 year old have so much randomness? He's definitely our collector kid. He'll keep scrap pieces of paper "because Mummy, it isn't garbage". Okay, so that was all done while he was at school! Next step, tackle his closet. His baby brother will be moving in with him soon so we needed to create a closet that was going to be functional in holding both the boys clothes. I had taken a few pictures of our operation clean out but I have no idea where I have stored them on the computer. Grrrr. Let's just say I had no idea that closet could house so much stuff/junk. Wowza.

Once it was gone our idea was to place one of these babies...

Ikea Expedit Shelf


into the centre of the closet and attach clothes rails to either sides so that the boys clothes could be divided and storage in the middle. However, after we bought it, put it together and Mr. Fix-it carried it upstairs we learned that it was going to be too big. Argh! Have you ever tried to take apart a piece of furniture from Ikea successfully? Wasn't going to happen...so there was a corner in the baby's room that was calling for storage and the Ikea shelf had a new home.

So back to square one. Mr. Fix-it repaired, primed and painted the closet the colour of the room (Benjamin Moore November Sky) and painted and rearranged the shelves (Farrow and Ball Drawing Room Blue).


While Mr. Fix-it was busy painting, I went on the search for storage baskets. I found these square ones at Ikea:


and needed two shorter one to fit the top shelf. Homesense came to my rescue and a red and blue pair came home with me.
**

Now the boys shirts are all in one dresser and their pants and sweatshirts are nicely hung and divided in the closet. They each have a green bin on the bottom of the closet with their socks, underwear and our little guy's diapers. This way, they can reach everything they need to get dressed.


Re-painting and organizing your closet space is a fresh.fabulous.sophisticated way to feel purged of random junk that accumulates in there and leaves you feeling tidy and organized. So open those closet doors and get organizing.

Keep it Beautiful.


P.S. I have lots more to share with you on the ongoing projects. Remember the breakfast room reno? It's still going on and operation playroom organization happened...again! Stay tuned. Have a great weekend.

Weekend Bloggy Reading

Friday, February 8, 2013

Fabulous Friday: Breaky Room/Kitchen Reno

Happy Friday everyone!!

Excited for the weekend? Been a long week? After getting back from vacation, this work week feels like it has crawled by. However, on a fun note...I'll be starting my maternity leave in 4 weeks. Yeah!! Countdown is on.

With the time crunch of baby #3 coming, we have a list of projects that we want to start and finish. The breakfast/kitchen reno and nursery are our top two. So...here's the plan.

Breakfast Room

This is a room off the kitchen that currently holds our kitchen table and a lamp. Yup, that's it. It's a space that is reaching out for some love. This is what it looked like when we bought the house. Yikes!

We needed to say good-bye to the forest green and peeling linoleum floor. So we laid new floor, painted the room Farrow & Ball Pale Powder, added a kitchen table, chairs, drapery and a lamp. It has been the place we eat our breaky and dinner through the week.

It's now time to make better use of the space. Our kitchen is pretty small, so all my platters for entertaining have been hanging out in a moving box in the basement since move-in day. Anytime I've needed them, I dig them out and return them back to the dungeon afterwards. So, why not build storage in the breakfast room to give them a new home?

THE BREAKFAST ROOM PLAN:
- install base cabinets along one of the walls (we bought them from RONA)
- order and install counter top
- Mr. Fix-it build open shelves on top of counter to keep it pretty
- Have the sliding glass door to the deck replaced with french doors (I'm super excited about this part)
- Build a desk

I'll remind you that our kitchen looked like this when we bought the house...yup...brutes!

We removed the random fish decal wallpaper, painted the kitchen, replaced the appliances, laid down new hardwood floors, painted out the cabinets and counter top (BTW, this is a great way to spruce up your old counter), added new hardware and drapery (check out my post on DIY NO SEW ROMAN BLINDS). However, we figure while were doing the makeover in the breakfast room, why not order in new counter tops for the kitchen.

Seeing how March 27th is our baby's due date, we're working with some tight timelines. A tip to remember when doing a renovation yourself or with a contractor is, HAVE A SCHEDULE! Life is busy, so having a plan allows you to figure out when you can work on things and when you can't.

Here is what we have planned for the rooms. I tried to make this collage bigger but this is where my techie skills end! I forgot to add that we need a new sink in there too. I'm having a hard time finding one I like. Any suggestions in Ottawa? We're liking either a really deep stainless steel sink with a small side sink or one big stainless farm sink. Hmmmm.

It's going to be a busy weekend but I'm hoping to have a few step-by-step tutorials to share with you as we move ahead!

FYI...I'm now blogging for the Ottawa Mommy Club. Not sure what countertop to choose for your kitchen? Head over to OMC and check out my latest blog...What Countertop To Choose?


Have a great weekend.

Keep it Beautiful.

Related Posts Plugin for WordPress, Blogger...