Friday, October 19, 2012

Fabulous Friday - DIY Dry Erase Frame

TGIFF! Thank God its Fabulous Friday!

So, I had another post that I wanted to share with you today, but I realized just as I was finishing it, that I forgot to take the final "VOILA" picture. Ugh. So you'll have to wait and see next week.

But, here is a DIY that takes only a few minutes to do and its super cute.

Enter in DIY - Dry Erase Frame!

I've seen versions of these floating around Pinterest...

So, I thought I would make my own. Here is what you'll need...

Ingredients:

- Frame (I had a Pottery Barn frame hanging around that has been empty for awhile)
- Pretty backing paper
- Stickers (these are optional, I found these little hearts in my big guy's craft drawer and picked up the letter stickers at Michael's)
- Dry Erase markers (I picked these ones up at Michael's)


Directions:
1. Place your pretty paper in behind your mat or if your not using a mat just cut it to fit the glass.

2. Stick the stickers on the glass to say whatever you would like and...

3. Fill in your message

Easy peasy. I put this in our bedroom and Mr. Fix-it and I write little messages to one another once and awhile. Its nice to wake up to a love message now and then :)

Have a super weekend (again, my goal is to get those stripes on the walls!) Fingers crossed!

Keep it Beautiful.


This post has been linked to:
Weekend Bloggy Reading

Friday, October 12, 2012

Building a Shed

Happy Friday everyone! Yeah for a short week!

Mr. Fix-it has been working very hard on the backyard shed. Its finally DONE (well except for the window but that's going in during the Spring sometime)! Its seems like its been awhile since he built it and it has! However, its been hard to find time or perfect weather to paint it. So, this week the rain held off for a couple of days and VOILA...the shed!

Here are some tips when building a shed for all your stuff!!

Tip #1: What do you need a shed/garage for?
Are you building a garage or a shed? If you want to build a garage, make sure the city or town you live in doesn't have any issues with building new ones. I know Ottawa is super particular about that.

What you need to store will determine the size that you need. Do you need it to fit the lawn mower and some gardening tools? or do you need it to fit the lawn mower, gardening tools, bikes, kids outdoor stuff, patio furniture etc?

Tip #2: Shop around
If you're brave enough and want to create the shed/garage from scratch...power to you. We're not that brave and there are a zillion "kits" around that you can buy. Essentially, a big flat of lumber arrives on your driveway with a booklet of assembly instructions. There are lots of big box stores that sell sheds/garages. Here are some from our friends at the Home Depot and Lowes:

You can find steel sheds, plastic sheds, wood sheds...lots of options.


Home Depot


Home Depot


Home Depot


Lowes

This is the one that we bought...


Lowes

#3: Make sure that the storage shed is going to fit in your yard
I'm a visual learner, so Mr. Fix-it spray painted on the lawn and bushes where the shed would go. That way it gave us a visual of how much room it would take up. I thought I had taken way more pictures of this process...I'm pretty sure I did. Hmmm, they must be on my other camera...just not sure where that camera is?!

#5: Lay down a foundation.
Your shed has to sit on something. Check out Imagination Station Playhouse post for tips on laying a foundation.

#6: Read the Directions AND Follow them
This is an important step with these kits...dont skip steps and take your time! Even though the shed is a "kit", its time and labour intensive.

Walls almost up...

Getting there...

Something to remember is that the kits dont come with shingles. You'll need to get those separately. This is Mr. Fix-it shingling.


So, its a bit of a running joke that when we built our last shed in our old house, I was about 8.5 months preggers and was so ready for that shed to be done. So in my "this shed better be done before the babe arrives", I helped Nick shingle the roof. Not the smartest idea when you are carrying a watermelon! So we took this pic for fun. I'm only three months preggers in this picture. Already a bump...that's what number 3 does!

VOILA...a fresh.fabulous.sophisticated shed that now holds tons of stuff. It was a great way to clear out part of the basement (which now Mr. Fix-it is wanting to start as he sees it starting to empty!? Eeeks). The window will go in sometime in the Spring.


The colours I chose were:

Shed Trim: Black Bean Soup
Shed Door: Dinner Party
Shed Body: eeeks, I can't remember. I'm usually pretty particular about keeping all my paint chits. Oopsies.

This weekend I'm hoping to tackle the front hall. Right now it is painted Farrow and Ball Ringwold Ground. It used to be in the living room also. Not sure why it looks so pinky in this photo. Also not sure why all my text is all of a sudden bold?!

You can see a bit of the colour in my hall behind the table:

We had painted the living room and dining room Benjamin Moore Stonington Grey and I feel like the front hall and front enterance need something else which would improve the visual flow between rooms. So, next on the paint chit is Coventry Grey. I'm thinking that will go in the hall and something stripey in the front enterance. Oooh. Stay tuned! I'm hoping it will be fresh.fabulous.sophisticated.

BM Stonington Grey (living room and dining room)

BM Coventry Grey (new hallway and front enterance)

Obviously not a huge difference. Seems more of a difference on the actual paint chit.

Have a great weekend!

Keep it Beautiful.


Wednesday, October 10, 2012

Wednesday Yummies...Fall Salad and Cranberry Love!!

Happy Wednesday everyone!

Have you recovered from all that turkey? Feeling the turkey leftovers overload? I often feel like all I do is eat Thanksgiving weekend so I'm loving the thought of having a delicious salad to detoxify my system a bit.

I came across this fall salad...doesn't it look yum? The recipe has rav reviews and comes from Tyler Florence's show "Tyler's Ultimate".


Ingredients:

Candied pecans:
- 2 tablespoons unsalted butter
- 2 tablespoons packed light brown sugar
- 1/2 cup raw pecans

Maple-balsamic dressing:
- 1 small shallot, finely diced
- 1 teaspoon Dijon mustard
- 2 teaspoons balsamic vinegar
- 1/4 cup extra-virgin olive oil
- 2 teaspoons maple syrup
- Kosher salt and freshly ground black pepper

- 1 head endive, separated leaves
- 2 hearts frisee, hand torn
- 1 large radicchio, torn leaves
- 1 red pear, sliced
- 1/4 cup shaved Parmesan

Directions:

To make the candied pecans, set a nonstick pan over medium heat. Add the butter and sugar and once it has melted toss in the pecans and continue to toss to coat and cook evenly, about 1 minute. Transfer to a sheet tray lined with waxed paper (use 2 forks to separate pecans) while you prepare the salad.

Make the dressing by combining the chopped shallot, Dijon and balsamic vinegar in a large mixing bowl. Slowly drizzle in the olive oil while you whisk to emulsify. Add the maple syrup and season, to taste, with salt and pepper.

Assemble salad by tossing greens and pear slices in a large mixing bowl with maple-balsamic dressing. Top with shaved Parmesan and candied pecans.

This will be on our table for sure!

Oh and one more thing. If you have leftover cranberry sauce and not sure what to do with it...here are a few ideas that I found in the new President's Choice "Fresh Juice" magazine.


1. Spoon 1 tbsp of leftover cranberry sauce into each compartment of an ice-cube tray and freeze. Next time you need ice to cool a morning glass of orange juice or add some flavour to your water, pop out a cube and drop it in the glass.

2. Stir chopped fresh rosemary into leftover cranberry sauce and serve as a tangy topping on cream cheese and crackers. Or spread the mixture on toasted baguette slices, top with Brie and place under the broiler for 2-3 minutes until cheese begins to melt.

3. Cranberries are a great source of vitamin C and antioxidants that help keep your mind sharp and body moving. Put 2 tbsp of canberry sauce in the blender with your breakfast smoothie.

4. Cocktails! Add 1 oz vodka to 2 tbsp cranberry sauce in a short glass and top with soda water. For a fruitier twist on the Shirley Temple, add the cranberry sauce to equal parts lemon-lime soda and orange juice.

Enjoy!!

Keep it Beautiful.


This post has been linked up with:
Weekend Bloggy Reading

Sunday, October 7, 2012

Oh Baby! Let's Give Thanks!

Happy Thanksgiving weekend to all my fellow Canadian friends!

Everyone has something to be thankful for in their lives and I hope that you are able to spend time with your family and friends this weekend and enjoy a most delicious meal. We are spending this weekend with our family in Toronto and thrilled to be all together (my brother even flew in from Paris!).

We are so thankful to have a happy and healthy family and this Thanksgiving we are celebrating a new addition that will be joining our clan in March. We are expecting baby #3!!! We dont know if we'll be joining the pink team or adding to our blue team, but next month will be the big reveal. I'm feeling boy!


I hope that you are surrounded by beautiful fall weather. There are lots of things to look forward to, and love about Fall...here are some of mine. Do you have fall favourites?


Enjoy your turkey everyone! Remember, if you are entertaining guests this weekend, you don't have to look far to decorate your table. Freshly fallen leaves, branches, gourds and flickering candles will make your table fresh.fabulous.sophisticated.

Here is some inspiration:


Keep it Beautiful.

Friday, October 5, 2012

Fabulous Friday! - Chandelier Lighting

Happy Friday!

I've been wanting to do a post on chandelier lighting for awhile now. Today is the day! Lighting can make or break your room,so for Fabulous Friday...lets talk chandeliers!

It used to be that when one thought of a chandelier, you automatically thought crystal, sparkly, fancy.


These chandeliers are still extremely popular and can create shimmer, sparkle and beauty in the right room, but there are many other options. Lighting has come a very long way to include 1000s of different lighting looks. So when its time to choose the perfect chandelier for your room, the options can be daunting.

Many people think that it is the size of your table that determines the size of your chandelier. Nope. Its actually the size of your room that will call for the right size chandelier.

Here are some tips to keep in mind:

- If your dining room is smaller than 10' x 10', look for lights that measure 17" to 20" diameter.

- If your room is around 12' x 12', a 26" or 27" light would be appropriate.

- If your room is in the 14'-18' range, look for light that measures 24" to 36" in diameter.

Also, many times you'll see chandeliers hanging over tables that are so far away from the table. What exactly does that light? Not your guests, or your table. This is a common mistake that many make. Go take a look at your chandeliers...likely they are hung too high, because you may be surprised how low they are supposed to be to the table.

Here is a rule of thumb:

The bottom of your chandelier should be 30" (76 cm) above the tabletop if you have 8' (2.4 m) ceilings. If your ceilings are higher than 8', raise the chandelier 3" (7.5 cm) for every extra foot (30 cm).

You want that beautiful light to make a statement in the room and light it beautifully. So let's look at some beauties....

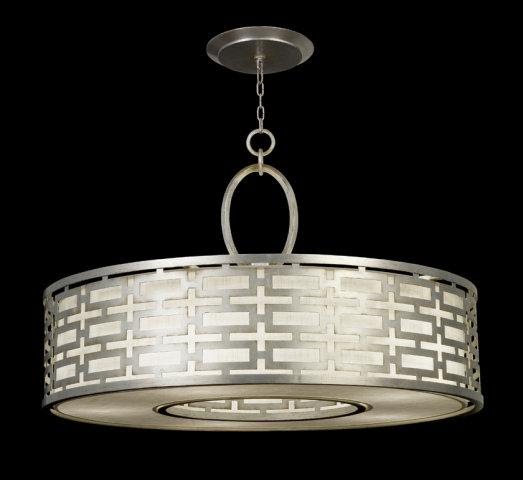
This light works with gold or silver


These could be fab in the right space!


This simple and elegant light is a beauty. And so is its price tag...its from Overstock.com and only 102.82!! (have you every shopped through them?...its a great site. Our kitchen light is from there). If your room wasn't too big, this could be a winner.


Stunning...


Modern...


These chandeliers from Restoration Hardware would look fabulous over a farm table at a cottage/lake house. Beautiful!


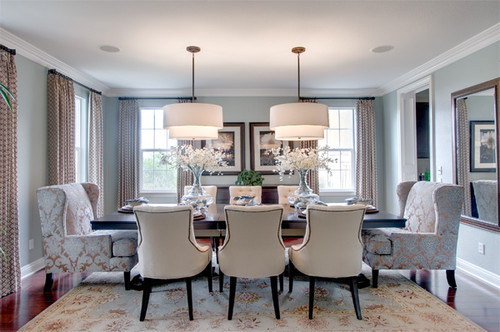
Okay, how gorgeous is this Pottery Barn capiz-shell pendant? Hanging multiples above your dining room table? Perfection! The soft glow and even softer price will make a statement.


Speaking of multiples...check out these lovelies...


This is our dining room chandelier. Its from Restoration Hardware but no longer available. I love it.


Lights that are on trend right now...

West Elm Capiz chandelier


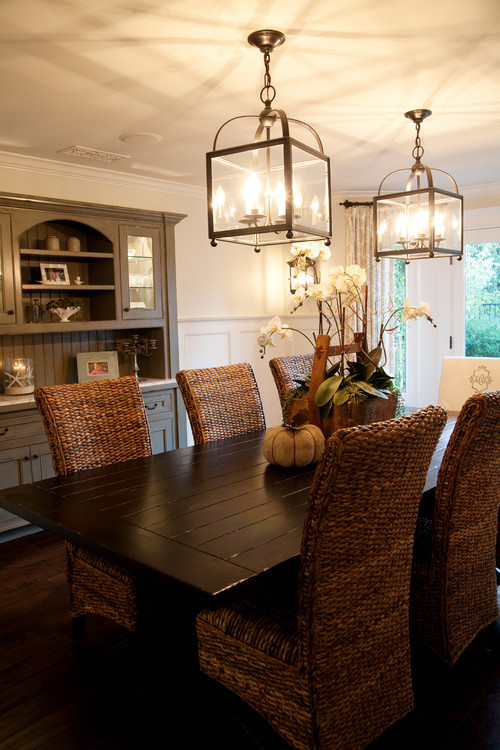
Lanterns are always on trend. This one is from Pottery Barn


Square lighting...this is from Elte


My friend Isabelle has this modern beauty from Mikaza hanging above her dining room table


This light has been featured in magazines (including the cover of Style at Home)


In the right space, a light you may not think will work...definintely can. With thousands of lights hanging in the lighting stores, it can be hard to see what would work in your space. Ask the employees to turn the lights on for you, or take them down to see what they look like when they are on their own.

Also, lighting prices can vary from inexpensive to out.of.control! Lighting is an area that I feel you should splurge on when thinking about your room's budget. Lighting can make or break your room...so...if you find a light that you love...just do it! You'll be happy in the long run.

And remember...make sure your chandelier is on a dimmer switch. No one wants to eat the yummy dinner you have prepared under harsh bright lighting. Turn it down and your light will create a fresh.fabulous.sophisticated space.

Keep it Beautiful.

Related Posts Plugin for WordPress, Blogger...